Install EML AdminTool
Installation
Let’s install EML AdminTool on your server. The installation process varies depending on your operating system.
To install EML AdminTool, run the following commands:
Caution
This script must be run with non-root user! However, it will ask for sudo permissions when needed.
curl -fsSL https://emlproject.pages.dev/install/admintool@latest | bashwget -qO- https://emlproject.pages.dev/install/admintool@latest | bashNote
The script will install the latest version of EML AdminTool. If you want to install a different version, please refer to the packages page.
When prompted for a domain name, you can enter the one you will use to access EML AdminTool (for example, at.emlproject.pages.dev), without http:// or https://. This is useful if you plan to configure HTTPS later using a reverse proxy (see Configuring NGINX). If you do not have a domain name, simply press Enter to skip this step.
Warning
For security reasons, EML AdminTool blocks access from unknown domains. If you do not specify a domain now, you will need to manually modify the configuration on the server.
First, go to Releases and find the version you want to install.
Download the docker-compose.prod.yml file from the assets of that version. You have to store it in a empty directory of your computer (C:\Users\<username>\.eml\admintool\docker-compose.prod.yml is a good choice). Do not delete or move this file, as it is required to run EML AdminTool.
Warning
EML AdminTool on Windows is only working for testing and development purposes. It is not recommended to use it in production on Windows servers.
Then, open a terminal (Command Prompt or PowerShell), navigate to the directory where you stored the docker-compose.prod.yml file, and run the following command:
docker-compose -f docker-compose.prod.yml up -dEML AdminTool is now available at http://localhost:8080/ from your VPS or http://<your-vps-ip-address>:8080/ from any computer. For the moment, we recommend using it only on your local network, as it is not set up and secured with HTTPS yet.
Warning
Currently, EML AdminTool is not secured: anyone who knows the URL can access it and set up the admin account. Make sure to set up EML AdminTool on a private network, or use a firewall to restrict access to it (or at least, configure EML AdminTool very quickly).
Setup
To set up EML AdminTool, you need to use a computer with a web browser.
Open the EML AdminTool web interface by navigating to http://<your-vps-ip-address>:3000/ in your web browser. You should be automatically redirected to the setup page.
Step 1: Choose language
Select your preferred language from the dropdown menu. EML AdminTool supports multiple languages, and you can change it later in the settings.
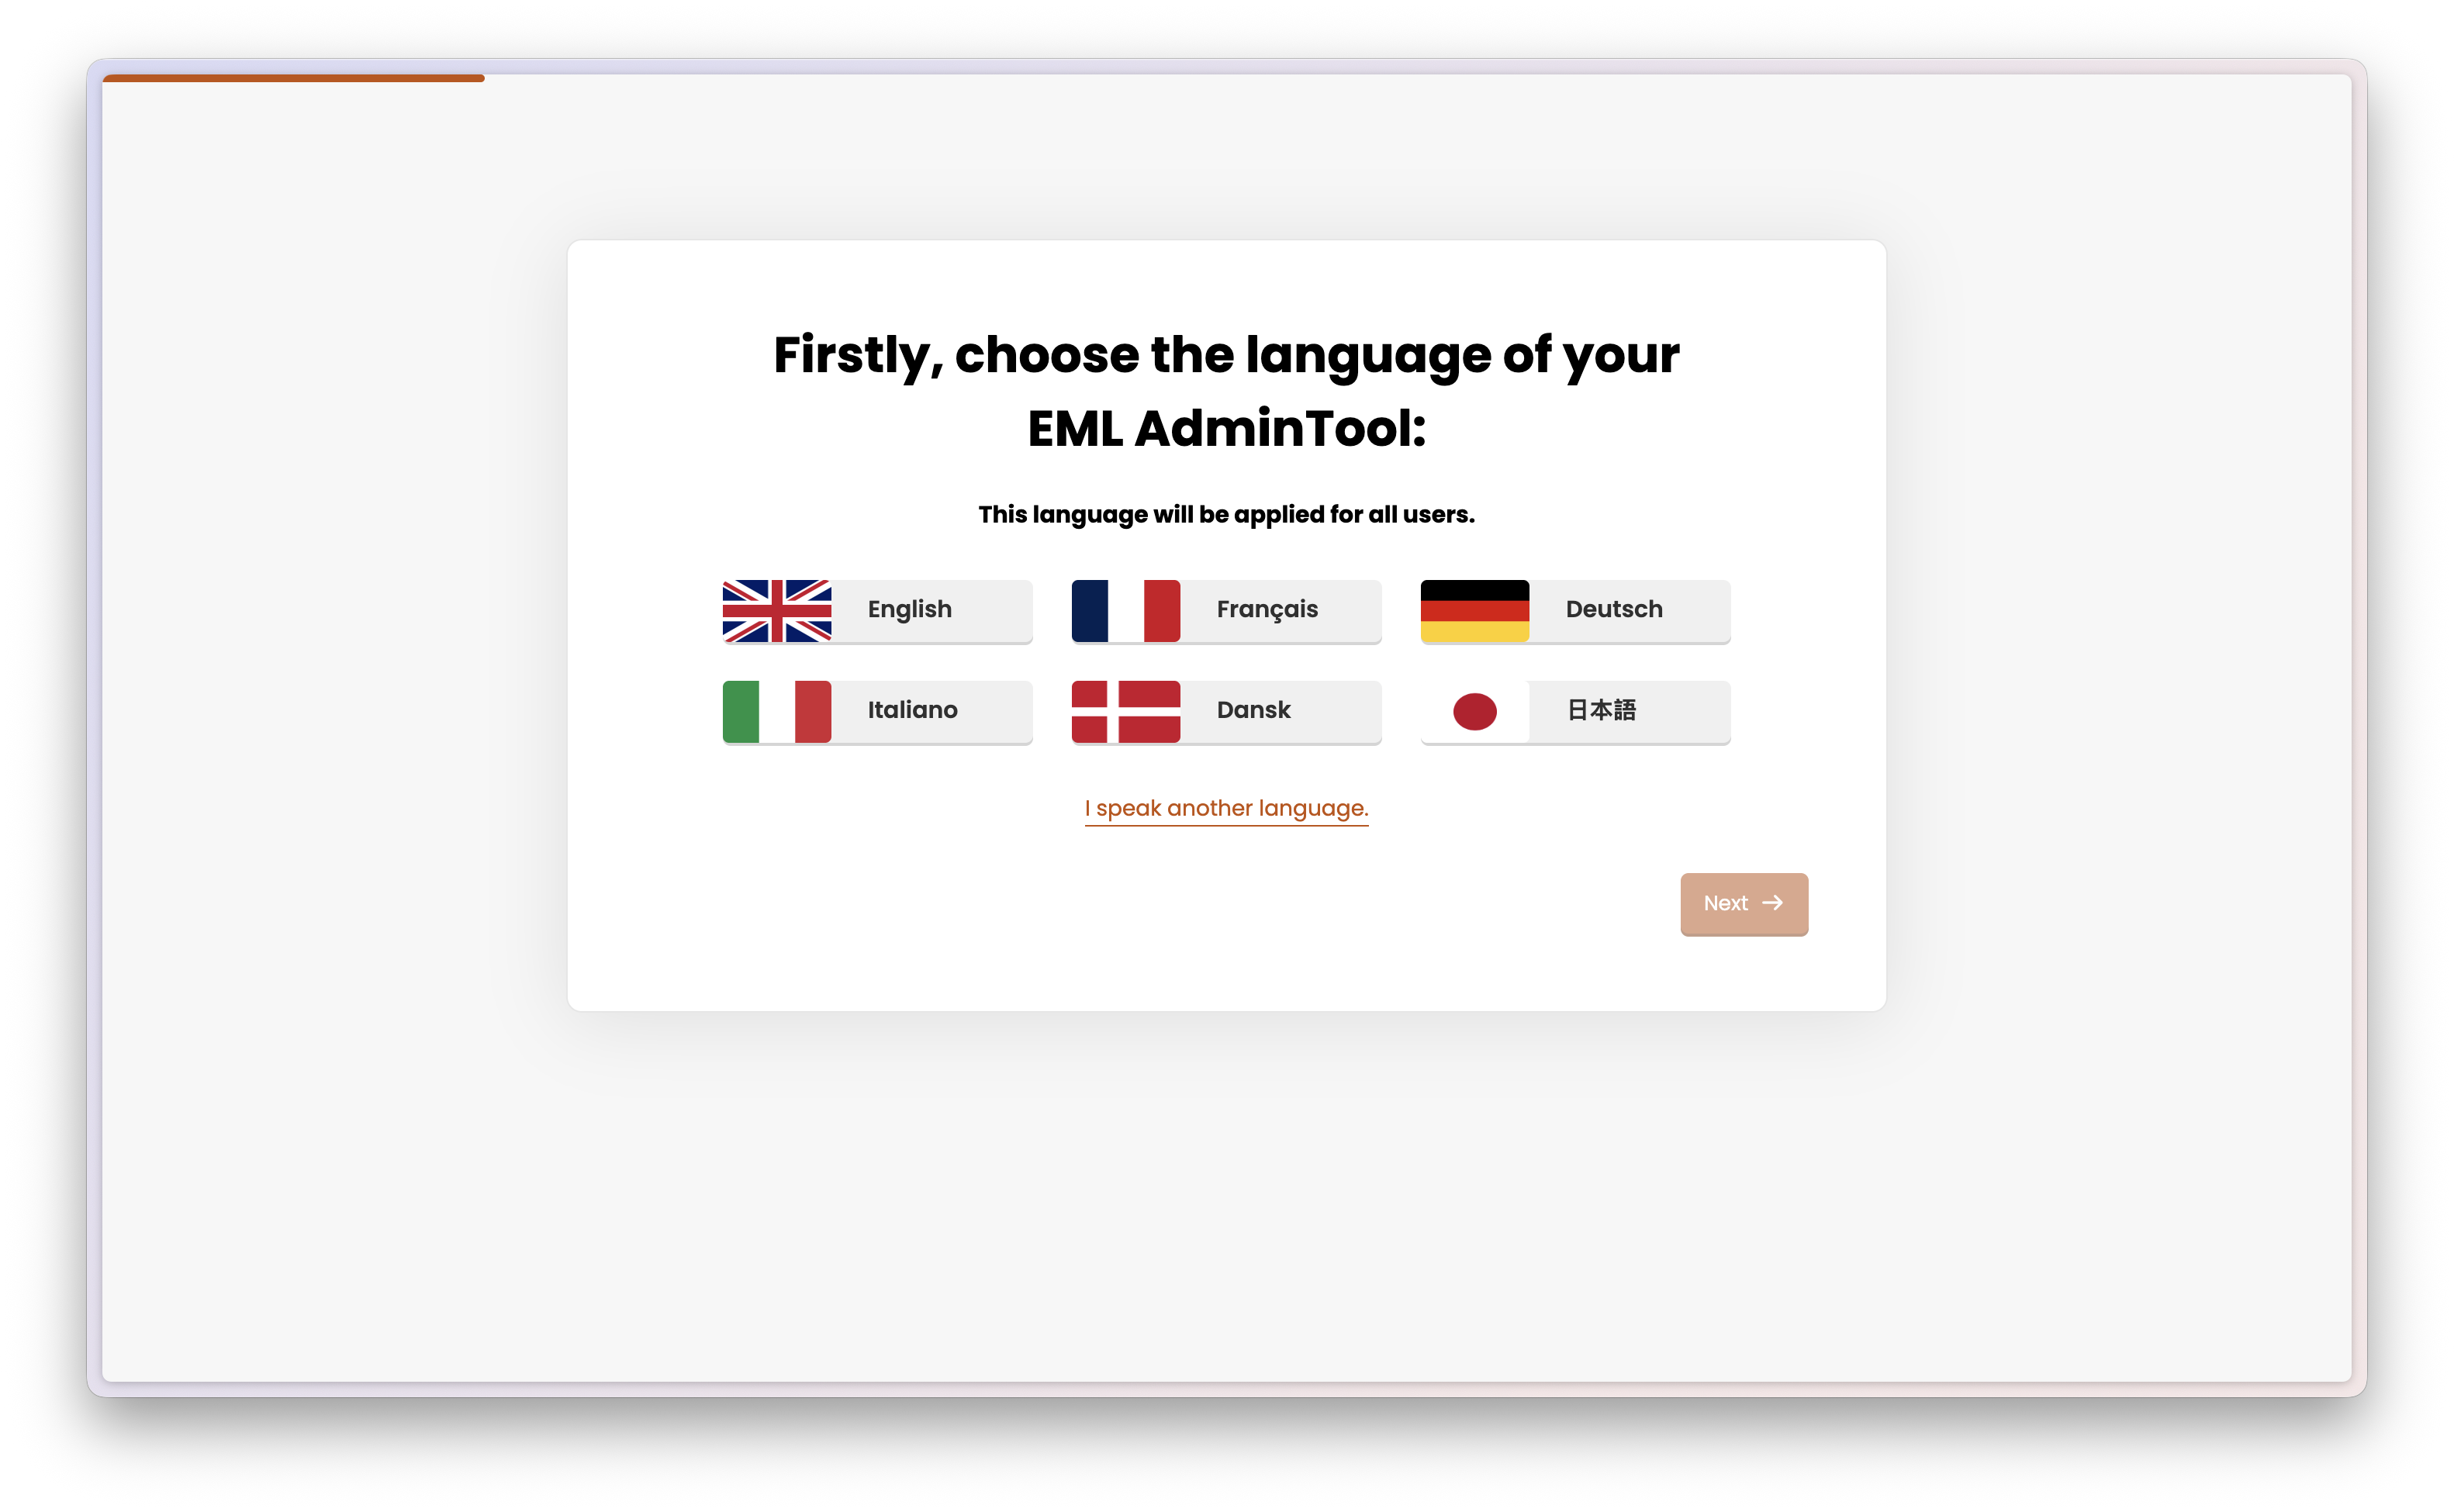
If your language is not available, you can contribute to the translation by following this guide.
Step 2: Generate a database password
On the second step, you need to generate a database password. This password will be used to connect EML AdminTool to its database. You don’t need to remember this password, as it will be stored securely in the configuration file.
Usually, you should use the “Generate” button to create a strong password. However, in some (rare) cases, you might want to access the database directly, for example, to run queries or backups. In this case, you can enter your own password. Make sure to remember it, as you will need it later.

Step 3: Create an admin account
On the third step, you need to create an admin account. This account will be used to manage EML AdminTool settings and other users. The admin account username will also be used to name your EML AdminTool instance: very often, it will be the same as your Minecraft Server name.
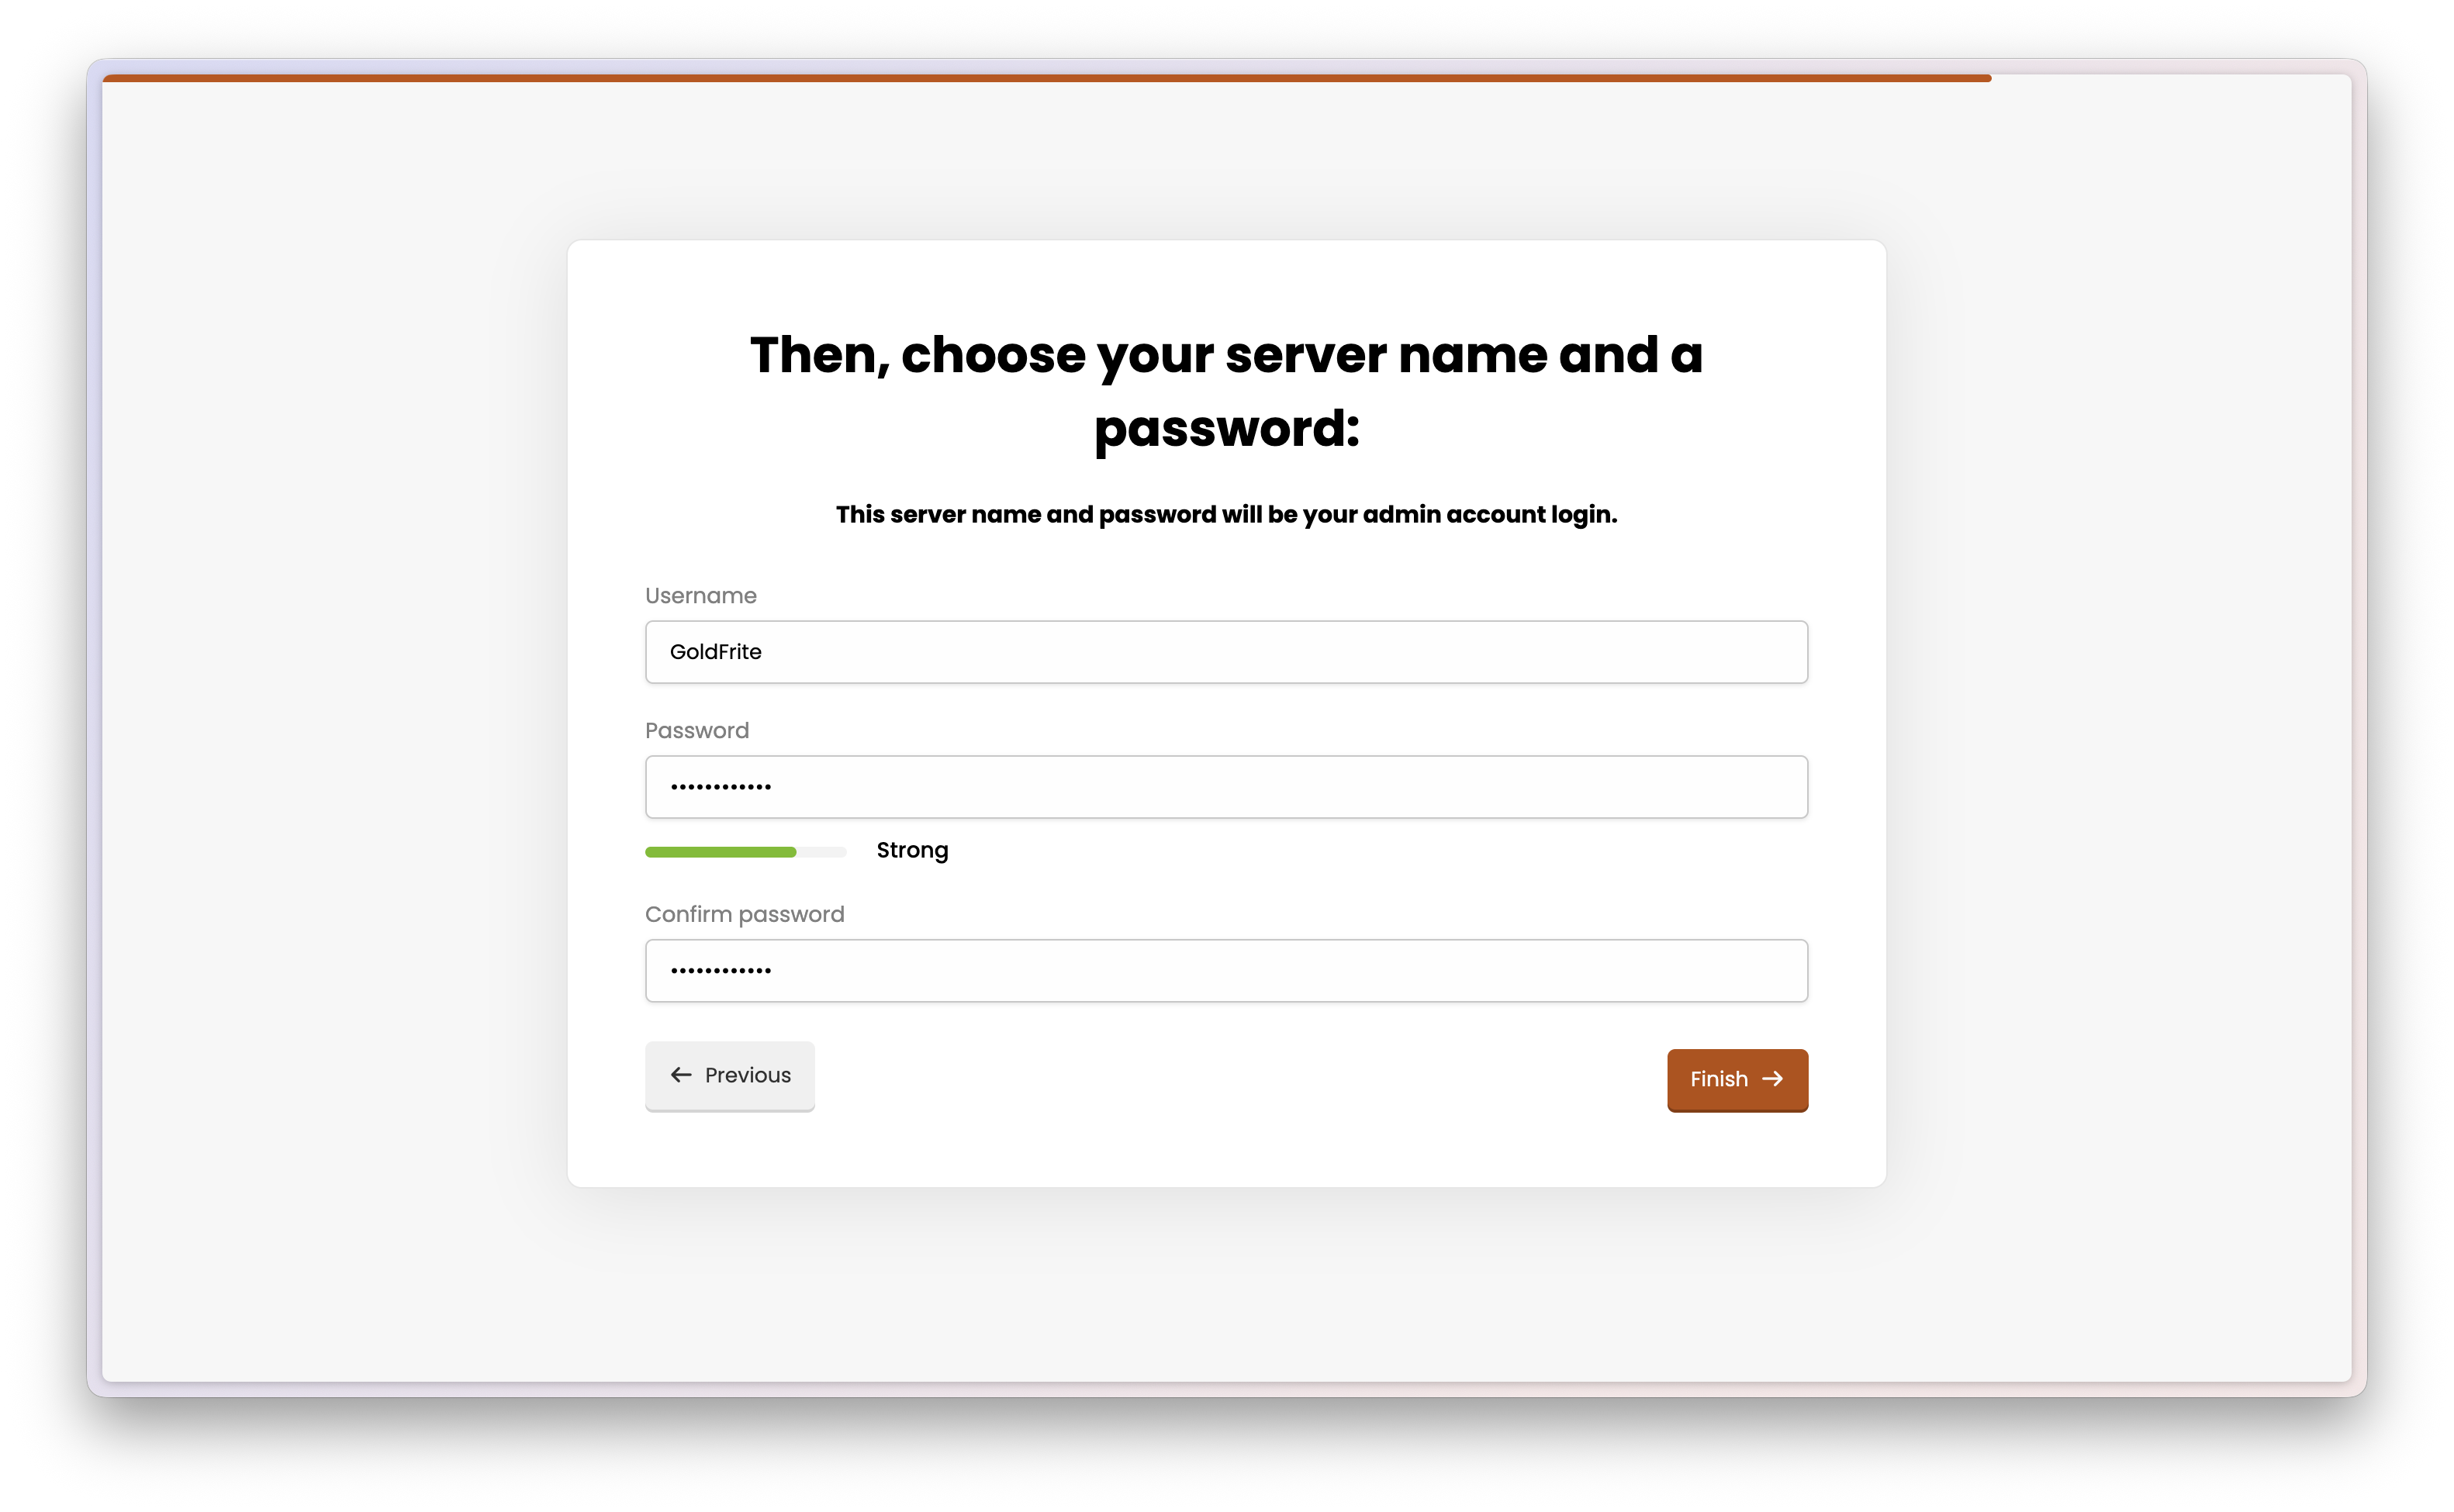
After clicking “Finish”, your EML AdminTool instance will restart to apply the configuration. The process may take a few seconds. Then, you will be redirected to the login page.
Note
If you are not redirected automatically after a minute, please refresh the page manually.
You can now log in to EML AdminTool using the admin account you just created.